Now that you’ve enabled ThoughtSpot Data Connect, you will be able to add a new data source. Data sources are the source systems from which you want to import data and schedule repeat data loads.
Data sources can consist of relational database sources, like SQL Server, or applications, like Marketo or Salesforce. To add a data source:
- Log in to ThoughtSpot from a browser.
-
Click on DATA, on the top navigation bar.

-
Click the Data Sources tab at the top of the page, and select + New data source on the upper right hand side of the panel.

- Select which type of connection you wish to use from the available list.
-
Select a connection type and click Next.

-
To select a connection, choose one of these options:
-
Select a pre-defined connection type, by choosing it from the Select Connection list:
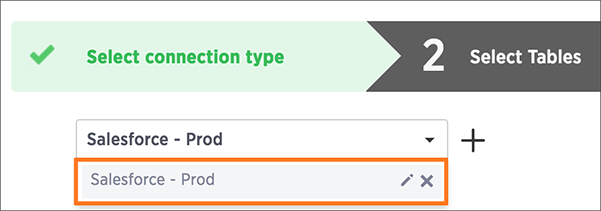
-
Click + to create the connection and provide the credentials to your data source. Then click Test & Create:
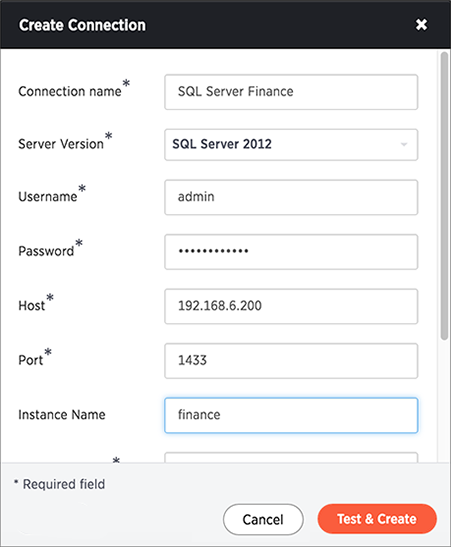
Refer to the Data Connect connectors reference for more information on each of the specific attributes you must enter into the dialog box.
-
-
Choose the tables you wish to load from the list of Available Tables.
Only the first 200 objects that occur alphabetically are listed per schema. If you want to access a table that falls below the first 200 objects alphabetically, you must use the object search bar.
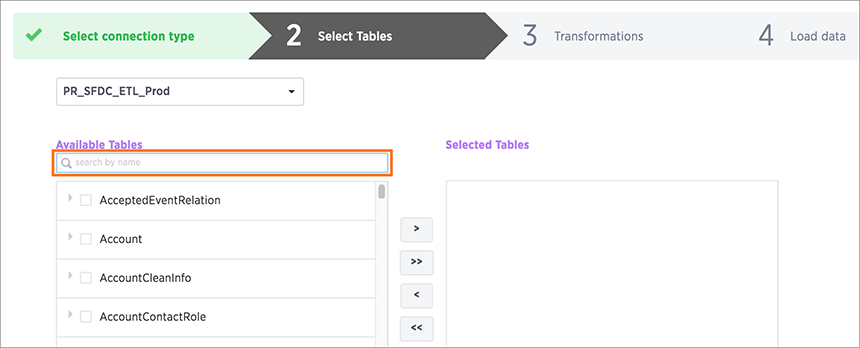
Here are examples of the user and system performed search patterns for this object search bar:
- User enters KNA, then the system performs a search for %KNA%.
- User enters KNA*, then the system performs search for KNA%.
- User enters *KNA, then the system performs search for %KNA.
- User enters “KNA”, then the system performs exact match search for KNA. Select the specific columns to import.
Field names must contain 65 characters or less and only contain alphanumeric or underscore characters. Spaces in column names are not supported. In addition, names cannot start with a number.
If you have a table with columns that violate these limitations, you can work around the issue by:
- Creating a View, which contains appropriate field names, based on the source table .
- Then use Data Connect to pull data and write the View to ThoughtSpot.
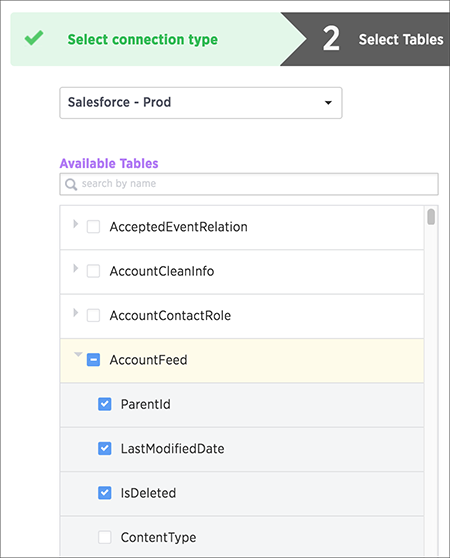
- When all the columns are selected, click > to move them to the Selected Tables box. Click Next.
- You can optionally apply a filter to only import specific rows by clicking New… under Data Filters.
- Select a table to filter.
-
Select a filter by specifying a column, operator, and value.

- Click OK.
- You can create as many filters as you need by clicking + and repeating these steps.
- You can optionally apply data transformations and write the result to a new column by clicking New… under Expressions.
- Give the new column an alphanumeric name (underscores are okay). You can rename it later in the ThoughtSpot application.
- Select the table and column the data will come from.
- Type in an expression. You can see a list of expressions by clicking the Expression assistant.

- Click Add Column.
- Click Validate to validate your expression before creating the data source.
- You can create as many expressions as you need by clicking + and repeating these steps.
- Click Next.
- Provide a Source Name for the data source.
- Check the list of columns to be imported, to make sure it is correct. If you are loading into new or empty tables, or if you want to delete any data that already exists in the tables, click the checkbox to select Truncate data in the existing tables.
-
If you want to specify repeat data loads, create a loading schedule.
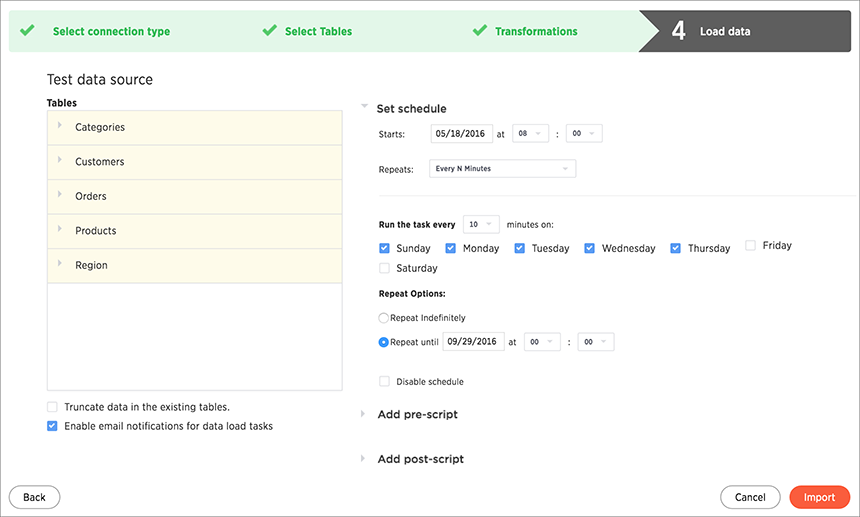
-
If you want to receive an email notification letting you know when your data load completes, select Enable email notifications for data load tasks.
Email notifications are only sent to the respective email address of the user who created the data source. You can’t send notifications to multiple email addresses.
To receive email notifications, you must enable Email me sharing notifications in your Profile Preferences. You also need to have an email set in your user properties found on the Admin User Management page.
- You can add a pre-script that will run your TQL script before the datasource uploads. Additionally, you can add a post-script that will run your TQL script after the data uploads. This feature is not available if Informatica Cloud Services is still in use.
- Click Import.
-
If you want to view or change the SQL DDL (data definition language) that will create the target table, click here.

-
Review and edit the schema as necessary. Click Load to load the tables.

- Click Load.
Your data source will appear on the Data Sources list page, and you can find the imported tables on the Tables list page. Tables imported via ThoughtSpot Data Connect display the job name in the Source column.