After you’ve determined your configuration options, you must set up your virtual machines (VMs) using a ThoughtSpot image for Azure.
About the ThoughtSpot image
To provision ThoughtSpot in the Azure portal, you’ll need to access the ThoughtSpot Virtual Machine in the Azure Marketplace.
The ThoughtSpot Virtual Machine comes provisioned with the custom ThoughtSpot image to make hosting simple. A virtual machine is a preconfigured template that provides the information required to launch an instance of ThoughtSpot. It includes the following:
- A template for the root volume for the instance (for example, an operating system, an appliance server, and applications).
The ThoughtSpot Virtual Machine has the ThoughtSpot software installed and configured, on an CentOS base image. Check with your ThoughtSpot contact to learn about the latest version of the ThoughtSpot Virtual Machine.
Due to security restrictions, the ThoughtSpot Virtual Machine does not have default passwords for the administrator users. When you are ready to obtain the password, contact ThoughtSpot Support.
Set up ThoughtSpot on Azure
Follow these steps to provision and set up the VMs and launch ThoughtSpot.
Prerequisites
Complete these steps before launching your ThoughtSpot Virtual Machine:
- Obtain an Azure login account.
- Set up usage payment details with Microsoft Azure.
- Set up a Resource Group.
Create an instance
To get started, you need to log in to the Azure portal, create a resource group, get the ThoughtSpot Virtual Machine on the Azure Marketplace, create a resource based on the VM, and complete initial setup. You can either start at the Marketplace or from within the resource group you just created, as described here.
-
Log in to the Azure portal.
In a browser, go to http://azure.microsoft.com, and log in to your Azure account.
-
Create a Resource Group.
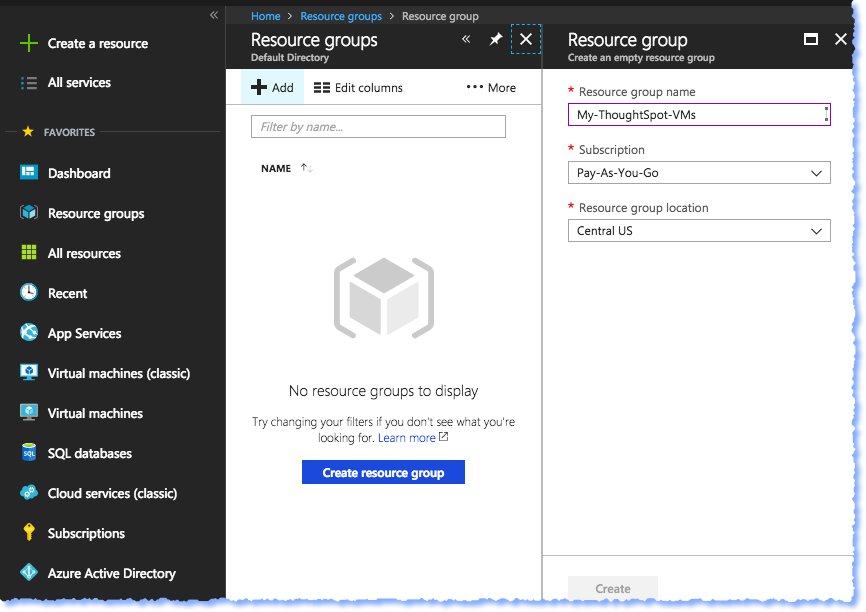
-
Next, create a resource based on the ThoughtSpot Virtual Machine.
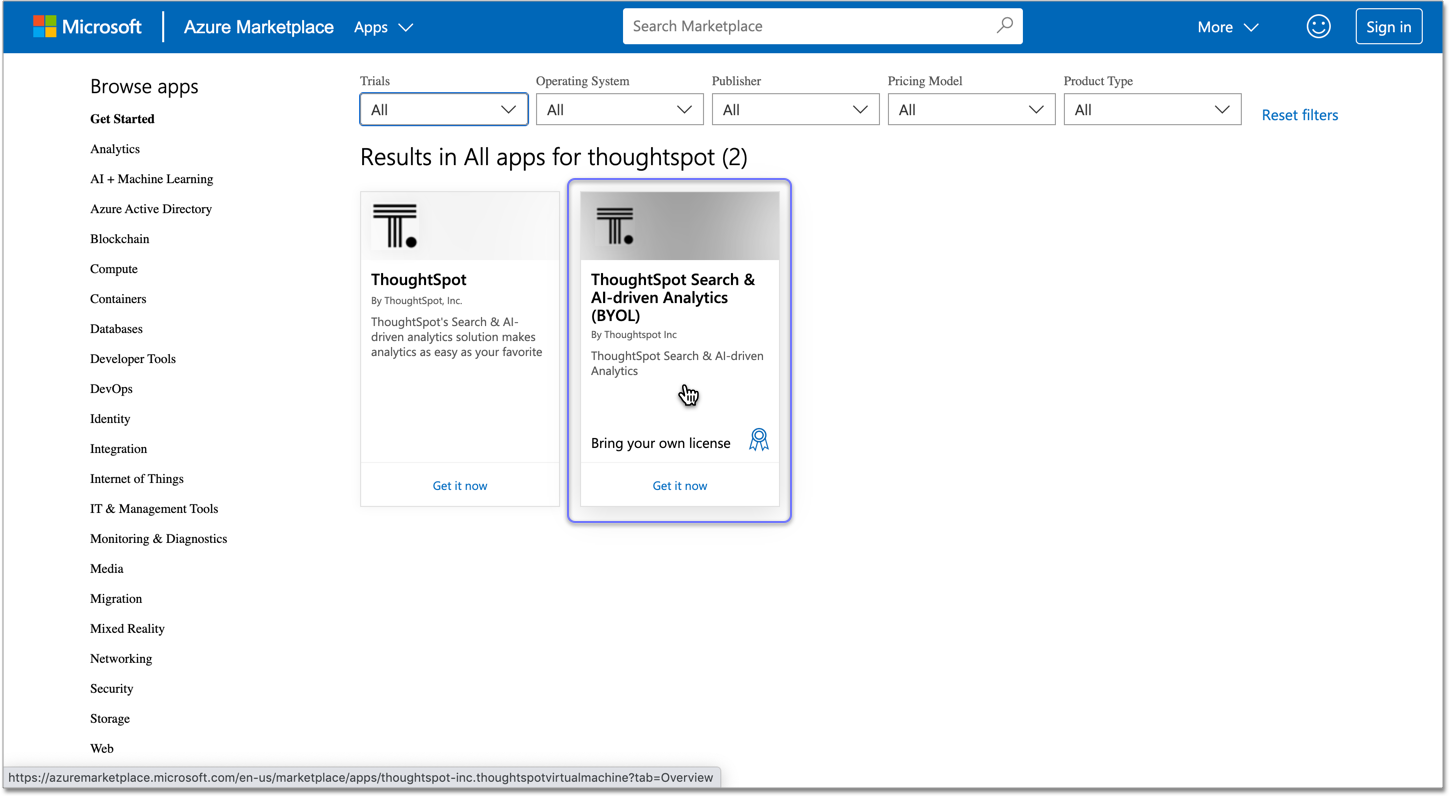
a. Click Create a resource, search the Marketplace for the ThoughtSpot Virtual Machine, and choose the ThoughtSpot Search & AI-driven Analytics (BYOL) image.
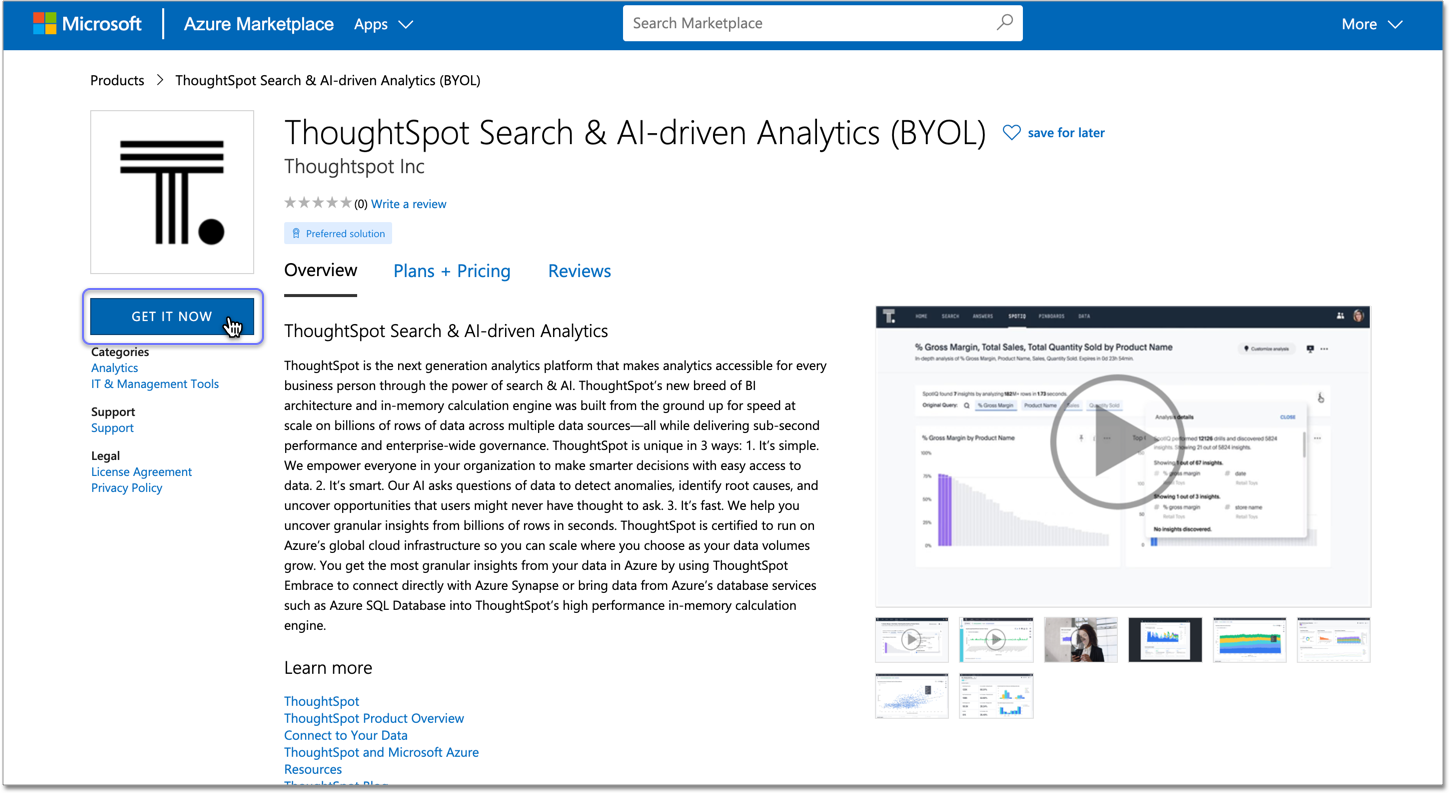
b. On the ThoughtSpot Virtual Machine page, click Get it now.
Configure basic settings
-
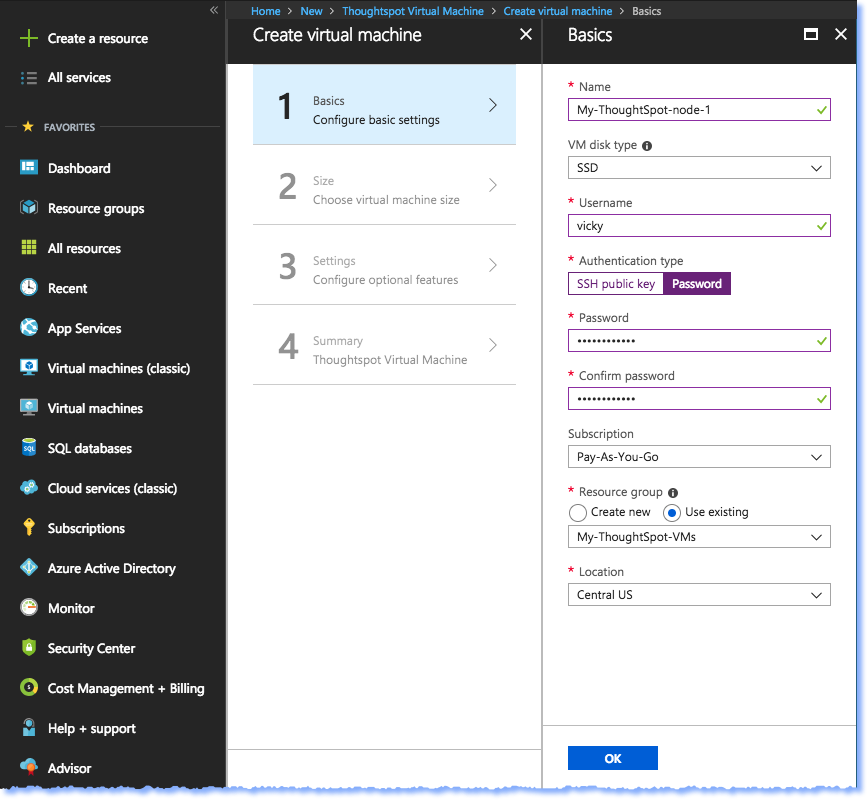
Provide a name and password for your new virtual machine.
-
Choose a disk type.
Tip: the new SSD disk types are currently available for only particular regions, so if you choose this disk type, make sure it’s supported on the region you chose for your VM.See Standard SSD Disks for Virtual Machine workloads for more on SSD disks.
-
Provide a Resource Group, by clicking
existingand selecting one. -
Select a location.
-
Click OK to save the Basics, which should look similar to the following example.
Choose a machine size
Refer to Azure configuration options to choose a size for your VM that works for your cluster needs.

Configure network settings, storage, and other options
Prerequisite: Get the details needed for setting up the Virtual Network, Subnet, and Network Security Group from your Azure support team.
-
For storage, select Yes to use managed disks.
-
Under Network, select Virtual network, then Subnet, then Public IP addresses, and set those names, addresses, and ranges approriately for your network.
-
Open the necessary Inbound and Outbound ports to ensure that the ThoughtSpot processes do not get blocked.
The minimum ports needed are:
Port Protocol Service 22 SSH Secure Shell access 443 HTTPS Secure Web access 12345 TCP ODBC and JDBC drivers access Note: ThoughtSpot requires that nodes purchased from Azure must be reachable to each other so that they can communicate and form a distributed environment. ThoughtSpot only requires that those ports be accessible between nodes within a cluster. Use your discretion about whether to restrict public access or not for all nodes/all ports -
Leave other configurations such as
auto shutdownandmonitoringon their default settings.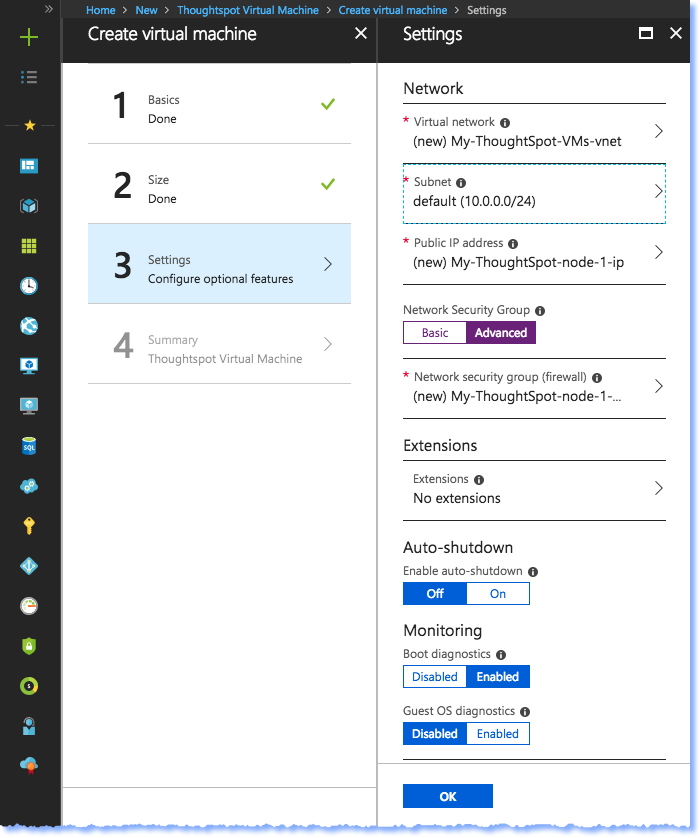
-
Click OK.
Azure will do the final validation check.
Review the Summary
Verify that the validation check succeeded and that summary of information shown is correct. If you find errors, reconfigure as needed.
When you are satisfied with the virtual machine setup, click Create.
Prepare for starting up ThoughtSpot
Prerequisite: To log in to the VM, you need the private key that is available in the image. You can obtain this from your ThoughtSpot contact.
-
Obtain the VM’s public and private IP addresses.
- To see the public IP, click the VM name link. This will show the public IP of the VM.
- To see the private IP click Networking (under SETTINGS on the left side of the screen).
-
Connect to the VM through SSH, using the private key provided for the admin user.
- You must file a support ticket to obtain this private key; it is necessary for the first login.
- This key is different from the credentials, or the private keys supplied in earlier steps, which do not work in this context.
-
Update the password for both the
adminand thethoughtspotusers.$ sudo passwd admin Changing password for user admin $ sudo passwd thoughtspot Changing password for user thoughtspot -
Update the file
/etc/hostswith all the node IP addresses for the other VMs that will be part of the ThoughtSpot cluster.
Add Storage Disks
- Go back to the VM and click it.
- Add 2 SSD disks of 1TB each.
- Click Add data disk and choose Create disk from the menu.
- Create one mode data disk (demo-disk2) and save them both.
- Click Save to add the disks to the VM.
-
Verify that the disks were added by issuing this command in the shell on the VM:
$ lsblkWhich returns results like:
NAME MAJ:MIN RM SIZE RO TYPE MOUNTPOINT fd0 2:0 1 4K 0 disk sda 8:0 0 200G 0 disk ├─sda1 8:1 0 1G 0 part /mntboot ├─sda2 8:2 0 20G 0 part / ├─sda3 8:3 0 20G 0 part /update └─sda4 8:4 0 159G 0 part /export sdb 8:16 0 1T 0 disk └─sb1 8:17 0 1T 0 part /mnt/resource sdc 8:32 0 1T 0 disk sdd 8:48 0 1T 0 disk sr0 11:0 1 628K 0 rom -
Unmount the temporary disk by issuing:
$ sudo umount /mnt/resource -
Prepare the disks /dev/sdc and /dev/sdd for ThoughtSpot by issuing the command:
$ sudo /usr/local/scaligent/bin/prepare_disks.sh /dev/sdc /dev/sddWarning: Do not use the disk /dev/sdb. This is reserved for ThoughtSpot use. -
Check the disks status by issuing:
$ df -h - Repeat the steps in this section for each node in your cluster.
Make network support settings
-
Update hostnames for all the nodes by issuing:
$ sudo hostnamectl set-hostname <HOSTNAME>If you are using a static name, you can issue:
sudo hostnamectl set-hostname <HOSTNAME> --static -
Update
/etc/hostswith the IP and hostname:$ sudo vi /etc/sysconfig/network-scripts/ifcfg-eth0 DEVICE=eth0 ONBOOT=yes BOOTPROTO=dhcp HWADDR=<Add eth0 MAC> TYPE=Ethernet USERCTL=no PEERDNS=yes IPV6INIT=no -
Do not reboot any of the nodes, until these changes are made to each node:
a. Open the grub file /update/etc/default/grub in an editor:
$ sudo vi /update/etc/default/grubb. Change the line:
GRUB_CMDLINE_LINUX="console=tty0 console=ttyS1,115200n8"to:
GRUB_CMDLINE_LINUX="console=tty0 console=ttyS1,115200n8 net.ifnames=0"c. Save your changes.
-
Issue these commands:
$ sudo cp /update/etc/default/grub /etc/default/ $ rm /usr/local/scaligent/bin/setup-net-devices.sh -
Reboot the nodes.
Additional resources
As you develop your expertise in Azure VM creation, we recommend the following ThoughtSpot U course:
